Stefan Cameron on Forms
Building intelligent forms using Adobe LiveCycle Designer

'Tutorials' Category Archive

Form Object Order of Initialization

Here’s a quick observation you might find useful: The order in which form objects are initialized is “field and depth-first” according to the document order (the top-down order in which they appear in the Hierarchy palette in LiveCycle Designer). This means that fields inside a subform are initialized before the subform itself is initialized. When you think about it, it makes sense since this means that in a subform’s Initialize event, you always have access to properly-initialized child form objects. You can read more about event execution order in the LiveCycle Designer Scripting Basics document (page 24) as well as in the

XFA Spec (page 353 in version 2.7).

Say your form object hierarchy looked like this (in the Hierarchy palette in Designer):

Hierarchy Order

The fields and subforms would get initialized in the following order:

Order of Initialization

To clarify, this is the order (note that text objects don’t get initialized just like squares, circles and images wouldn’t — image fields would, however):

  1. DateTimeField1
  2. TextField1
  3. PasswordField1
  4. Subform2
  5. NumericField1
  6. Subform1
  7. CheckBox1

To demonstrate this, I’ve provided the form that contains the objects above. When you preview the form (or view it in your web browser) using Acrobat, use the JavaScript Console to see the output from the Initialize events of the various form objects to see the order of initialization.

Download Sample [pdf]

Minimum Requirements: I created this form in Designer 8.1.1 SP2 and tested it in Acrobat Pro 8.1.2.


Posted by Stefan Cameron on May 9th, 2008
Filed under Events,Scripting,Tutorials

Video Tutorial on Customizing Form Guides

A colleague of mine on the Form Guide Team, Gilles Maurice, has assembled an extensive video-based tutorial on customizing Form Guides (a new Flash/Flex-based form technology available as of LiveCycle Designer 8.1) using Flex Builder, sample code included.

This tutorial goes beyond the customizations you can do with the Guide Builder tool and uses Flex Builder to create customized guide and panel layouts as well as customized components for displaying data and more. If you’re in to form guides or you’re curious about what you can do with this technology, this should be well worth your time!


Posted by Stefan Cameron on April 14th, 2008
Filed under Form Guides,Tutorials

Prevent Printing PDF Forms in Acrobat 8

This is something many of you have asked me about in the past and I never had a definite answer. The only method I knew of was to use a print button from the Object Library palette and add some checks for invalid data (or unfilled fields) inside its click event which is set to call xfa.host.print() by default. The problem with this method is that the user could still print using Acrobat’s print command (either via “File > Print”, the print button in the toolbar or by using “Ctrl + P”).

I didn’t know any better because, well, prior to Acrobat 8, there wasn’t really anything better and the reason was that form validations simply weren’t triggered prior to Acrobat receiving the command to print. So while you could easily prevent a form from being submitted electronically if validations failed, there was no definitive way to prevent it from being printed… until Acrobat 8 and XFA 2.5 came along, that is.

Advanced Tutorial: Before you read further, I should warn you that this is an advanced tutorial as it (unfortunately) requires editing the “XML Source” using Designer since Designer doesn’t have settings for this yet.

New Validate element in the Config DOM

In version 2.5, the Present element in XFA’s Configuration Document Object Model (“Config DOM” for short), which houses configuration options for XFA applications (such as Acrobat and Reader), was extended to have a Validate element.

This element can have any of four optional values, each separated by a space: “prePrint“, “preSubmit”, “preSave” and “preExecute”. By default, the element is not specified and the default behaviour (which is the same when the element is specified but contains no values) is to validate prior to submitting the form only. Once values are specified, then validations are run only prior to the specified events.

For example, if you wanted to have a form that prevents the user from printing but not submitting when a mandatory field is empty, you would specify the following validate element in the Config DOM (the ellipsis mean there’s other stuff in there; what’s important is the validate element inside the present element):

<config>
   ...
   <present>
      ...
      <validate>prePrint</validate>
      ...
   </present>
   ...
</config>

Unfortunately, this isn’t something that you can reliably set via script since these options are typically read-in on load and aren’t read again. Furthermore, Designer does not yet support setting the values in the validate element. In order to set this option, you’ll need to edit the XML Source in Designer and find the following markup about 2/3 way down:

<config xmlns="http://www.xfa.org/schema/xci/1.0/">
   <agent name="designer">
      ...
   </agent>
   <present>
      <!--  [0..n]  -->
      ...

Once you’ve located the <present> element inside the <config> element (the Config DOM), you’ll need to insert the <validate> element:

<config xmlns="http://www.xfa.org/schema/xci/1.0/">
   <agent name="designer">
      ...
   </agent>
   <present>
      <!--  [0..n]  -->
      <validate>prePrint</validate>
      ...

(Notice the <validate>prePrint</validate> element above.)

When you’re done making the change, click on the Design View tab and make sure you say “yes” to have your changes applied.

XFA 2.8/Acrobat 9 Update: With the release of XFA 2.8 and Acrobat/Reader 9.0, the <validate> element is now located under the <acrobat> element in the Config DOM:

<config>
   ...
   <acrobat>
      ...
      <validate>prePrint</validate>
      ...
   </acrobat>
   ...
</config>

To ensure backward compatibility, if the <validate> element is not found under <acrobat>, Acrobat/Reader will fall back to looking inside the old <present> to see if it’s defined there.

Now you’re probably wondering what the different values mean so here’s a quick explanation:

  • prePrint: Failed validations prevent the form from printing.
  • preSubmit: Failed validations prevent the form from being submitted electronically.
  • preSave: Failed validations will not prevent the form from being saved however Acrobat/Reader will issue a special warning message, after issuing the validation error message, to inform the user that the validations failed. I’m guessing this is because the user may be saving the form to continue filling it at a later time so the save can’t be completely prevented.
  • preExecute: Failed validations will prevent the form from executing a data connection (usually to a web service).

In all cases, any validation error messages will be displayed and this should work in Reader 8 as well. If you have set validation warnings (as opposed to errors), then the warnings will be displayed but the user’s action will not be stopped.
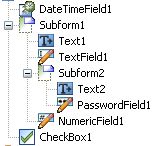
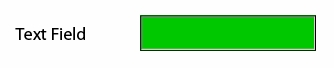
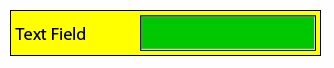
Sample Form

I took the time to put together a little sample form which demonstrates a Dynamic PDF form that cannot be printed nor submitted in Acrobat/Reader 8 and above unless the text field is filled.

Download Sample [pdf]

Minimum Requirements: Acrobat/Reader 8 or above.

Updated: December 20, 2008


Posted by Stefan Cameron on April 13th, 2008
Filed under Acrobat,Designer,Tutorials

Field Background Color Fill

Did you know that you can quickly set the background fill color of a field via script using the

fillColor

property? This can be very handy if you want to highlight a field for some reason. The property takes an RGB color value as a string: "255,0,0" would give a red fill.

What you may not realize is that fields actually have two areas: The "nominal extent" represents the entire field, including the caption, while the "content extent" represents only the data input portion of the field. There’s a difference between setting the fill color of one vs. the other.

The Nominal Extent Fill

When you set the fill color using the "fillColor" property, you’re setting the fill color of the nominal extent’s border property. It’s actually a shortcut:

TextField1.fillColor = "255,255,0"; // yellow

is equivalent to this:

TextField1.border.fill.color.value = "255,255,0";

Here’s a text field with no fill:

And here it is after setting its "fillColor" property to yellow:

(On a side note, you may notice that the field now has a border and you’re probably wondering where it came from. See this article for an explanation and what you need to do to get rid of it.)

The Content Extent Fill

So how do we set the fill color of the content extent without filling the entire field? The content extent’s fill color is specified within the field’s content extent (or "UI", in XFA terms) border and is accessed like this:

TextField1.ui.oneOfChild.border.fill.color.value = "0,200,0"; // green

(If you’re wondering what the "oneOfChild" property is, see this article.)

The result of the above line of script on the initial text field is as follows:

For example, you could use the content extent fill color as a way to communicate to someone that a field is disabled (by setting its content extent fill color to light gray (230,230,230)).

Finally, you can combine the two as follows (this being the combination of setting both the nominal and content extent fill colors):


Posted by Stefan Cameron on March 14th, 2008
Filed under Scripting,Tutorials

Book now available: Creating Dynamic Forms with Adobe LiveCycle Designer

That’s right: The day has finally come! Designer officially has its very first book on the market, thanks to J.P. Terry at SmartDoc Technologies.

The book is the result of J.P.’s own expertise and a collaborative effort with the Designer Team in Ottawa. It tackles form design and techniques in building dynamic XML-based PDF forms with Designer.

As Alan Siegel (Founder & Chairman of Siegel+Gale, branding pioneer and champion of simplifying corporate communications) put it,

“J.P. Terry is a rare individual who understands both the design and technical issues involved with effective communications. This book will teach you about LiveCycle Designer but more importantly it will teach you about effective form design.”

How to get the book

The book is now available for immediate ordering at the following sites

as well as at various local bookstores.

For some reason, it’s still on “pre-order” status at Amazon.com but should be “officially” available shortly.

The Designer book will also be available for purchase at MAX 2007 and I will be giving away a copy or two at my hands-on sessions on Designing PDF Forms and Flex-based Form Guides so be sure to attend if you’re at MAX 2007 North America!

Sample Files Posted

For those of you who already have the book, you can now download the sample files from SmartDocTech.com.


Posted by Stefan Cameron on August 30th, 2007
Filed under Books,Designer,Instance Manager,Scripting,Tables,Tutorials